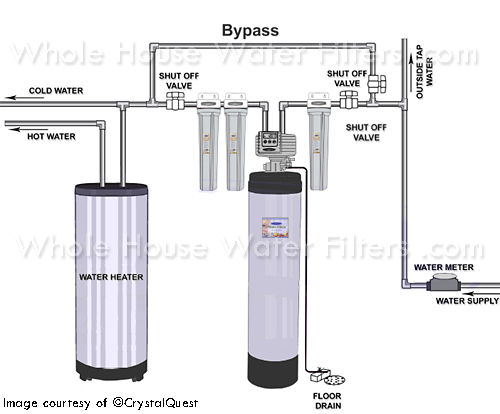
How to Install a Whole House Water Filter
How to install a Whole House Water Filter?Usually, installation is a snap when water line is easily accessible and you have enough room to locate a system where main line comes into the house and before it connects to a hot water heater.
Installation Steps
Step 1: Determine System Location
Determine where the system will be positioned. Identify whether there's enough space for all components, including space to open any filter housings to replace them.Step 2: Drain Water from the system
First, turn off water at the main water supply. Drain water lines by opening a faucet at the lowest point in the home.
Step 3: Cut the Pipe
Cut the water line in the location you are going to install it. Don't forget that there may be some water left in the pipe.Step 4: Attach Fittings
Your Whole House System may have come with fittings that are correct for the pipe type you are using (such as copper or plastic). If not, do some planning ahead of time and order correct fittings. Fittings should be installed on the pipe where system and/or housings will be properly and SECURELY connected to it. Remember that you may have to support all housings with L- or U-shaped brackets that are commonly used with "Big Blue" housings.Step 3: Test the system
Once everything is installed and securely connected, tests the system by letting some water through it. Look at behavior, noises and potential leaks.And, of course, don't forget to change filters as needed or as specified in a system manual!
©2008 - 2024 Whole House Water Filters.com Privacy About whole house water filters